
How nice is it if your leisure battery is charged when the sun shines? You see a solar panel on almost every motorhome; and rightly so! It is environmentally friendly and you are less dependent on shore power or an alternator. Even if it is cloudy, the solar panel will still provide power.
1. How do campervan solar panels work
Once sunlight hits a solar panel on your campervan it generates electricity. The generated voltage is then on average between 16 and 100ths of volts (depending on your installation) and is then sent to a device. This device ensures that the battery is charged with the correct voltage. You cannot connect solar panels directly to your battery. Later in the blog this device – solar called charge controller – will be explained, but first we focus on the solar panels.
How does a solar panel provide optimal power?
This is hard to say, we have to take into account the following factors:
Position of the solar panel: The optimal yield is obtained at an angle of 35 degrees, panels facing south. This is difficult to achieve on the roof of your RV.
Seasons & weather conditions: In summer, the yield is generally higher than in winter; summers are longer and the sun is higher. Obviously, you will not achieve maximum efficiency on a cloudy day.
Size (power) and quality of the panel: The more wattage the panel has, the more it yields. Also, the quality of the panel is important; high efficiency = more yield.
2. What campervan solar panels can I choose from?
There are countless brands and webshops selling solar panels, but which one should you choose? In chapter 3 you can use the calculator to find out how many watts of solar panels you need. In the current chapter we explain what types of solar panels are available.
Glass Panels
Currently, glass panels are the most commonly used solar panels. A glass panel consists of a layer of glass, with a layer of solar cells on the back, with a plastic film behind it; you have two variants: Monocrystalline and polycrystalline.
Monocrystalline
- These solar panels are made from a single crystalline silicon rod;
- Monocrystalline are more efficient compared to Polycrystalline solar panels;
- They require less roof area for equivalent efficiency;
- Recognisable by a black tint;
- More expensive than polycrystalline solar panels.
Polycrystalline
- These solar panels are made of multiple pieces of silicon;
- Less efficient compared to Monocrystalline;
- More roof area required for equivalent efficiency;
- Recognised by a blue tint;
- heaper than monocrystalline solar panels.


Then we have two lesser-used variants:
Flexible panels
- Easily installed on curved surfaces;
- Barely increase the height of your vehicle;
- Easy to install;
- Lighter than glass panels;
Foldable panels
- Good alternative if you don’t have space on your roof;
- Park your campervan in the shade and put your panels in the sun;
3. Wiring your campervan solar panels
Series or parallel connection
There are two ways of connecting solar panels to your campervan: in series or parallel. Which circuit is best for you depends on a number of things.
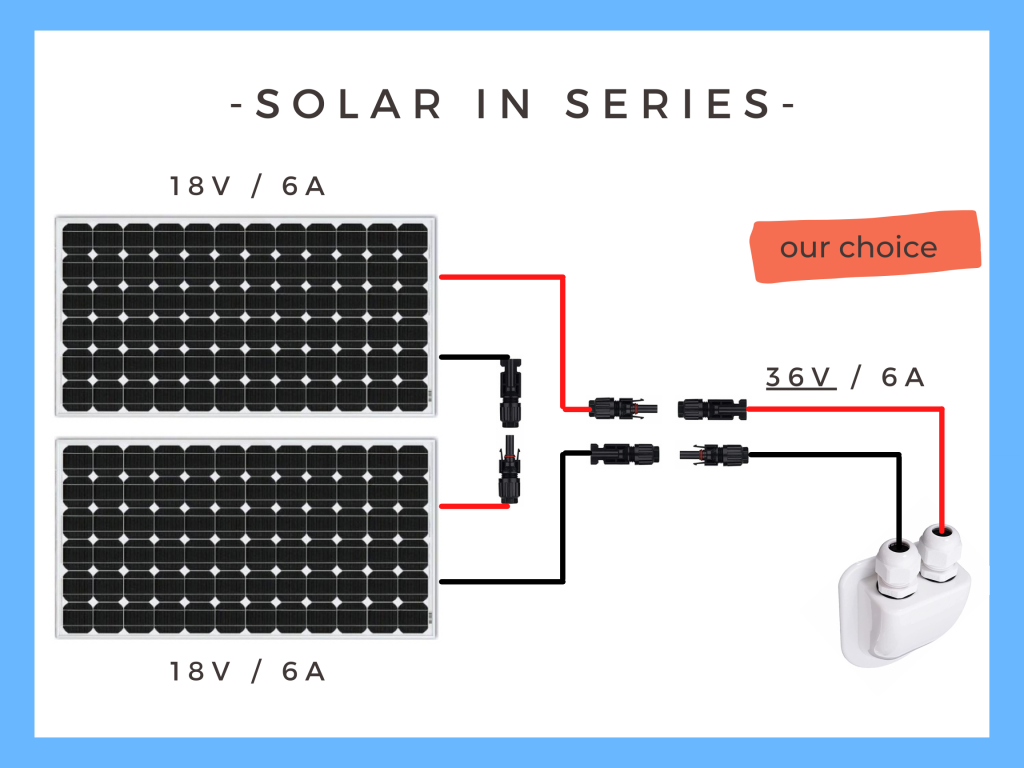
Series connection
In this connection, the panels are connected to each other via the plus and minus. This makes for an easy installation. Choosing this circuit will increase the voltage of your panels and reduce losses. One drawback is that this circuit is sensitive to shading. If one of the solar panels is not fully in the sun, it will affect the entire installation.
Advantages of wiring series:
- Easy installation
- Low losses
Disadvantages of wiring series:
- Sensitive to shading
Parallel connection
In parallel connection, you connect the plus of one panel to the plus of the other panel. Similarly, the minuses are also connected to each other. This circuit creates a low voltage with high current, therefore it is less cost effective.
Because you connect the pluses to each other and connect the minuses to each other you need separate adapters for this. If you want maximum efficiency you will also need to install optimizers. These devices optimize the output of the panel, but can also switch it off if, for example, the panel is in the shade. This makes parallel connection a more expensive solution.
Advantage of wiring parallel:
- Less sensitive to shadows
Disadvantage wiring parallel:
- Separate adapters needed
- More expensive solution than series connection
- Thicker cable because of rising current

4. Solar Charge controller campervan
Now that the solar panels for your campervan has been chosen, they need to be connected to something. You connect your wires to a device called: a solar charge controller. You cannot connect a solar panel directly to your battery. The battery needs to be charged with the right voltage. And a charge controller ensures that the battery is chargefd with the correct voltage. There are two types of charge regulators: MPPT & PMW.
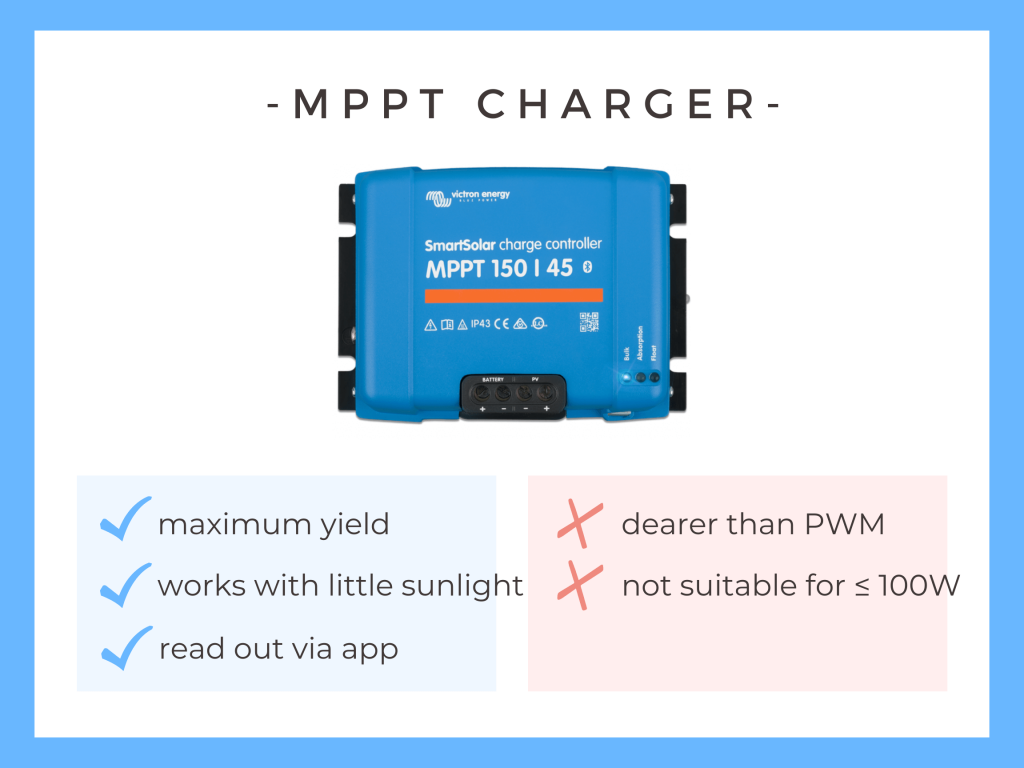
MPPT
MPPT stands for Maximum Power Point Tracking, this technique ensures that the regulator gets the maximum energy from your solar panel.
We’ve heard good stories about Victron and Epever.
This is the solar charge controller you want for your campervan.
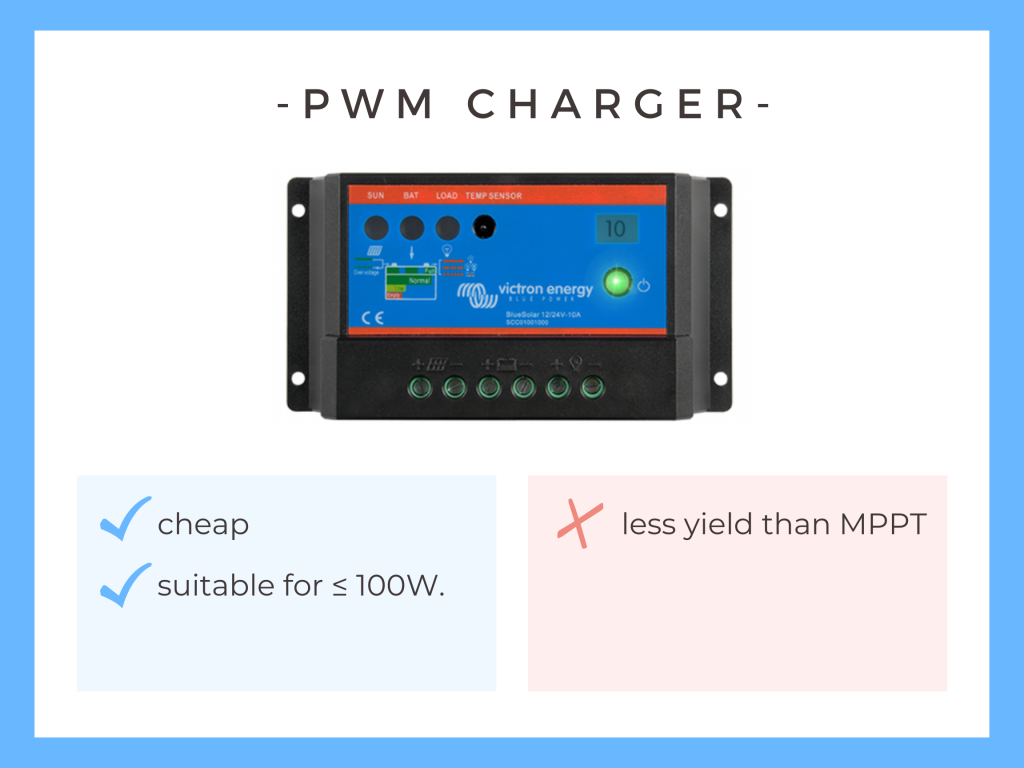
PWM
PWM stands for Pulse Width Modulation, and is known for a less advanced technique. For a single solar panel this would be an excellent and cheaper option.
5. Additional Information solar panels
This section explains what else you should consider before purchasing solar panels.
Estimated consumption
To calculate how many watts of solar panels you will need, it is useful to know how much electricity you consume on a daily basis. You think about what appliances you will be using in your campervan and for how many hours a day. You would like to know the consumption of these devices, in Watts. You can find this on the charger of your device, in the user manual or on Google. The next step is to enter the data into our calculator. This program will calculate your estimated consumption and the calculate the solar panels needed.
To give you a hand you can use our consumption as an example, click on: Autofill Lot and Gijs.
Mounting
You might have seen a picture or heard a story: someone loses a solar panel while driving. This is something you definitely do not want, which is why it is important to secure your solar panels properly! One way is to use a roof spoiler in combination with mounting brackets. These plastic profiles are ideal for mounting your solar panel. They are meant to be glued on the roof of your campervan. Ultimately, the most important thing is that your panels are properly secured. Therefore, always use a bolt with a locknut as an extra security.
Furthermore, it is important to use the right cable thickness and fuses. This blog post will go into more detail about that. The Electrical Wiring Diagram calculates cable thickness and fuse size.
6. Making a choice
In order to make your own choice you need to understand your estimated consumption.
This is easy calculated by using our program. All you have to do is think of all the devices you want to use and enter them in the calculator.
Does the amount of solar panels not fit on your roof? No problem, this can be compensated by charging the leisure battery through the alternator.
7. Our choice
We first installed our roof window and Maxfan, which left little room for solar panels. We were fortunately able to create space for two monocrystalline solar panels, each with an output of 100 watts.
We connected the solar panels in series. Because we do not suffer from shadows, this was the simplest choice.
The solar panels are attached with a roof spoiler and “side brackets”. They were only attached with caulk, which we regret afterwards (Always attach extra with bolts!).
Our solar panels are connected directly to our Ective SSI 15, which has a built-in 20A MPPT charger, battery charger (shore power) and inverter function.
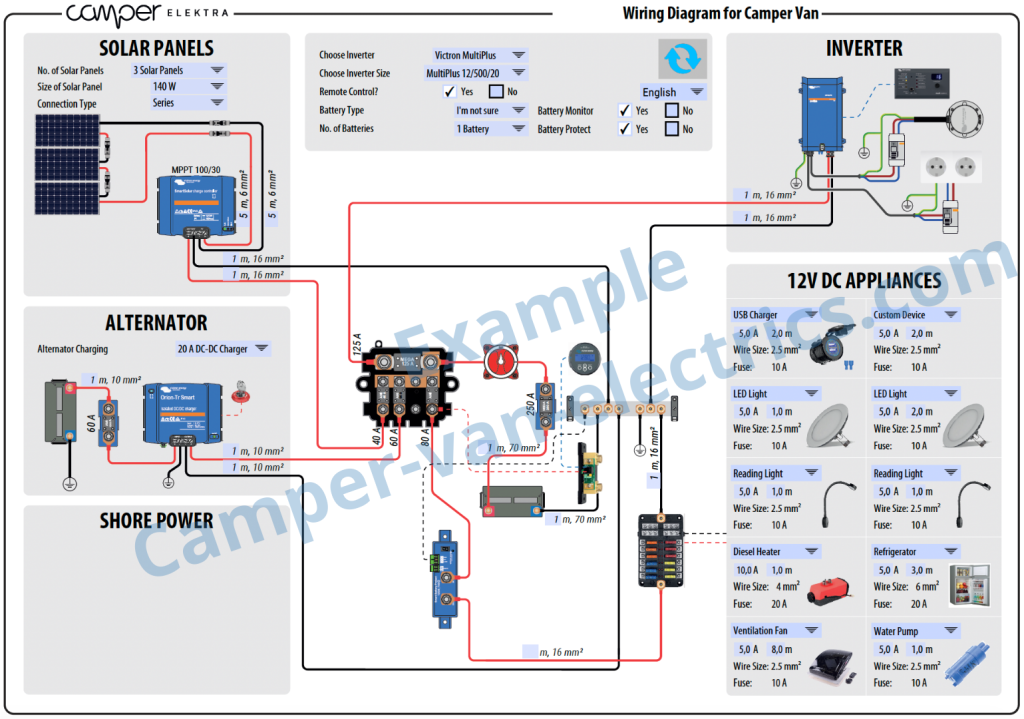
Campervan solar panels and charge controller neatly arranged in a diagram? You can! And to give you a hand, we have developed 3 files in which you can design your own unique wiring diagram.
Hey! By the way… any links on this page that lead to products on Amazon are affiliate links and I earn a commission if you make a purchase. Thanks in advance – We really appreciate it!